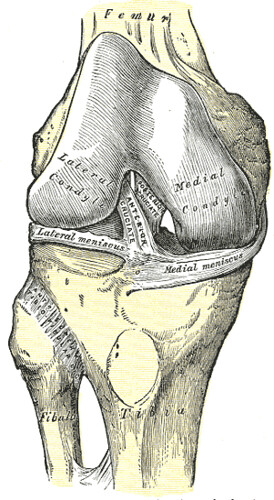
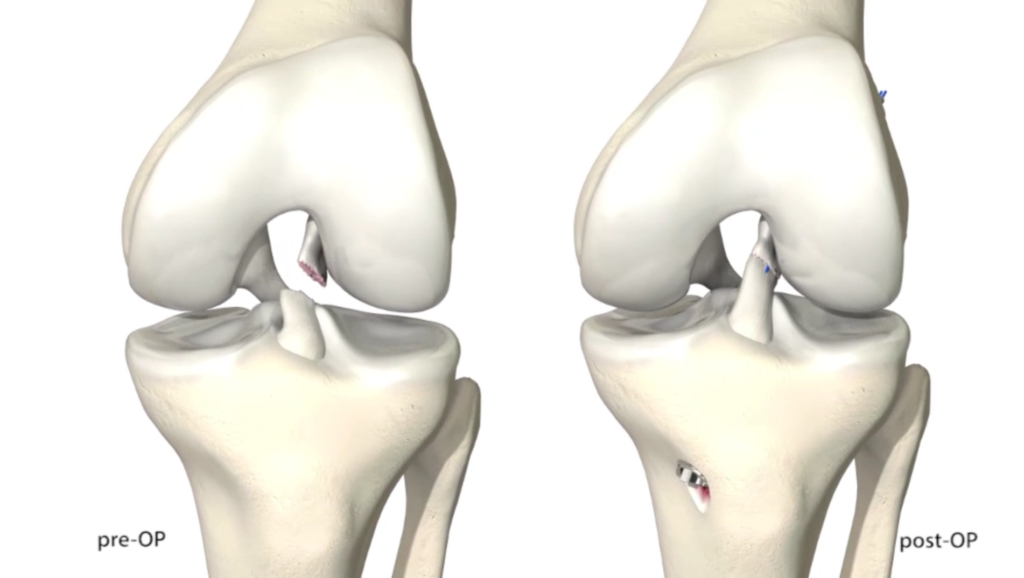
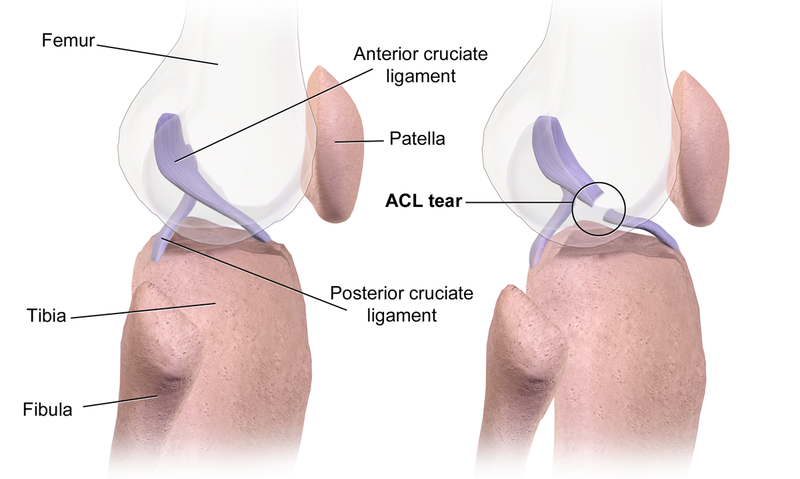
Anterior cruciate ligament (ACL) is one of the most important ligament of the knee joint, which prevents the anterior tibial translation and internal rotational loads as well as valgus angulation. Injury to the ACL ligament leads to the ACL tear, depending upon the grades of tear treatment protocol varies. ACL reconstruction can be done in most of the case if its grade 3 tear. Recovering from ACL reconstruction is challenging but its not that hard, if you follow the proper guidelines based on the scientific evidence. After post-surgery, early-stage rehabilitation plays a crucial role in ensuring a strong comeback. Doing things right in the first few weeks after surgery is very important because it helps you recover fully.
In this blog, we’ll discuss the main aspects of early-stage ACL rehabilitation based on expert recommendations. If you are an athlete worried about returning to sports or someone who is aiming to restore activities of daily living then this blog post might be helpful for you.
Before starting any of the rehab protocols you need to know about the “Dos” and “Don’ts” of the condition.
Dos: What You Should Do
- Focus on Full Knee Extension
- Do Gentle Exercises
- Follow Guidelines
- Manage Pain and Swelling
- Protect the Graft.
- Engage with Your Therapist
- Maintain a Healthy Diet
Don’ts: What You Should Avoid
- Don’t Overdo Exercises
- Don’t Skip Swelling Management
- Don’t Neglect Your Crutches
- Don’t Perform High-Stress Movements
- Don’t Compare Yourself to Others
- Don’t Ignore Pain
- Don’t Stay Inactive
Why Early-Stage Rehab Matter
After surgery, our body undergoes various physiological changes, which lead to pain, swelling, and muscle weakness. If you don’t manage these symptoms early, it can slow your recovery and cause more problems down the line. That’s why it’s key to stick to your rehab plan and tackle any problems early. The following are the goals of early rehab;
Goal
- Week-1: Emphasize pain and swelling management, gentle ROM exercises and quadriceps activation exercises.
- Week (2-3): Increase range of motion up to 120 degrees, add mild weight training, and concentrate on crutch walking.
- Week (4-6): Increase activity, improve movement quality, and start more structured strength training.
Week-1: Emphasize pain and swelling management, gentle ROM exercises and quadriceps activation exercises.
During the first week, the focus is on managing discomfort, reducing swelling, and gently activating your muscles.
Exercises
1. Cryotherapy and Elevation: 3–4 times a day, 20 minutes per session.
2. Ankle pumps
![]() How to perform:
How to perform:
- Lie or sit down with your leg straight.
- Move your foot up (toes toward you) and down (toes away) as if pumping a gas pedal.
- Perform 2 sets of 20 reps.
3. Passive Knee Extension
How to perform:
-
- Sit down and rest your leg with a rolled towel under your heel.
-
- Let your knee straighten naturally without forcing it.
-
- Stay like this for 5–10 minutes, and if it feels comfortable, you can gently press down on your thigh.
4. Quadriceps Isometric Contractions
How to perform:
-
- Sit or lie down with your leg straight in front of you.
-
- Squeeze your thigh muscle (quadriceps) like you’re trying to push the back of your knee into the floor.
-
- Hold for 5 seconds, then relax.
-
- Repeat this for 5 sets of 10 repetitions.
4. Heel Slides
How to perform:
-
- Lie on your back or sit with your leg straight out.
-
- Gently slide your heel toward your butt to bend your knee as far as feels comfortable.
-
- If needed, use a towel around your foot to help guide the movement.
-
- Do 2 sets of 10 repetitions.
5. Patellar Mobilizations:
-
- Gently move your kneecap up, down, and side to side to prevent stiffness and improve mobility.
-
- Do this for 1–2 minutes several times a day.
Weeks 2–3: Improve ROM, Light Strength Training, and Walking with Crutches
Now that swelling is decreased and the knee can move, the attention turns to the restoration of range of motion (ROM), the initiation of gentle strengthening exercises, and walking patterns using crutches.
Exercises
1. Stationary Cycling
How to perform:
-
- Adjust the bike seat so your leg is nearly straight at the lowest point of the pedal.
-
- Pedal gently for 5–10 minutes with no resistance, keeping your movements smooth.
-
- Only try this if you can bend your knee at least 90 degrees.
2. Knee Extension Stretch
How to perform:
-
- Sit with your leg straight and place a rolled towel under your heel.
-
- Gently press your knee down toward the floor and hold the stretch for 5 minutes.
-
- Relax and let your leg stay in this position.
3. Leg Press (Closed Kinetic Chain)
How to perform:
-
- Sit on a leg press machine or use a low surface for resistance.
-
- Position your feet shoulder-width apart.
-
- Slowly push the platform up, extending your legs in a controlled motion within a 30–60° range.
-
- Lower it back down carefully in a controlled manner.
-
- Repeat for 2 sets of 10 reps.
4. Step-Ups (Pool or Land)
How to perform:
-
- Stand in front of a low step or use a pool if you have access to one.
-
- Step up with one foot, pressing through your heel to lift yourself.
-
- Use a stick for support when starting out to maintain balance.
-
- Slowly lower yourself back to the starting position.
-
- Repeat 2 sets of 10 reps on each leg.
5. Straight Leg Raises
How to perform:
-
- Lie on your back with your healthy knee bent and your recovering leg straight.
-
- Tighten your thigh muscle and lift your leg about 12–18 inches off the ground.
-
- Slowly lower it back down and repeat for 2 sets of 10 reps.
-
- Make sure your knee stays straight and doesn’t bend while lifting.
6. Walking Practice with Crutches
How to perform:
-
- Place crutches slightly forward, with your weight evenly distributed on both arms.
-
- Step forward with your recovering leg, moving your weight evenly.
-
- Don’t limp or lean towards one leg.
Weeks 4–6: Structured Strength Exercises, Movement Quality, and Increased Activity
By this stage, your pain and swelling should be manageable, and you should be able to move around a lot easier. You can begin to do more formal strength training and mobilization exercises.
Exercises:
1. Restricted ROM Knee Extensions (Open Kinetic Chain)
How to perform:
-
- Sit on a knee extension machine.
-
- Set the machine so that the motion is limited to a 45–90° bend.
-
- Slowly extend your leg, hold for 1–2 seconds, then lower it back down.
-
- Begin with light weights (1–3 kg) and do 3 sets of 15 reps.
2. Mini Squats (Closed Kinetic Chain)
How to perform:
-
- Stand with your feet shoulder-width apart.
-
- Slowly lower yourself into a squat, making sure your knees don’t go beyond your toes and stop at about a 60° bend.
-
- Push back up through your heels to return to standing.
-
- Do 2–3 sets of 10 reps.
3. Treadmill Walking (or Underwater Walking)
How to perform:
-
- Walk slowly and steadily on a treadmill, or in water if you have access to a pool.
-
- Concentrate on keeping your weight evenly distributed and maintaining a natural walking pattern.
-
- Start with 10 minutes and gradually increase the time as you progress.
4. Glute Bridge
How to perform:
-
- Lie on your back with your knees bent and feet flat on the floor.
-
- Tighten your glutes and lift your hips until your body forms a straight line from your shoulders to your knees.
-
- Hold the position for 2–3 seconds, then slowly lower back down.
-
- Do 2 sets of 10 reps.
5. Step-Downs
How to perform:
-
- Stand on a low step with one foot hanging off the edge.
-
- Slowly lower your hanging foot toward the ground, keeping control of the movement in your recovering knee.
-
- Return to the starting position.
-
- Do 2 sets of 10 reps on each leg.
6. Pool-Based Jogging
How to perform:
-
- Jog slowly in waist-to-chest deep water, keeping your movements steady and controlled.
-
- Aim for 10 minutes, 2–3 times a week, to help improve your cardiovascular fitness.
Precautions
-
- Avoid hyperextension beyond 10 degrees to protect the graft.
-
- Check for infection or DVT, watch for increased redness, warmth, or pain in the calf.
-
- Consult your physical therapist or surgeon before introducing new exercises or progressing intensity.
Safety Tips for All Exercises
-
- Pain Management: If an exercise causes pain >2/10 on a pain scale, stop or modify it.
-
- Swelling Check: Monitor knee swelling; adjust intensity if it worsens.
-
- Posture Awareness: Focus on proper form to avoid compensatory movements.
The following table shows the goals and weekly exercises in brief:
| Goals | Exercises |
| Week 1: Pain and swelling management, gentle ROM exercises, and quadriceps activation | -Cryotherapy and Elevation -Ankle Pumps -Passive Knee Extension -Quadriceps Isometric Contractions -Heel Slides -Patellar Mobilizations |
| Week 2–3: Improve ROM, light strength training, and walking with crutches | -Stationary Cycling -Knee Extension Stretch -Leg Press -Step-Ups -Straight Leg Raises -Walking Practice with Crutches |
| Week 4–6: Structured strength exercises, movement quality, and increased activity | -Restricted ROM Knee Extensions -Mini Squats -Treadmill/Underwater Walking -Glute Bridge -Step-Downs -Pool-Based Jogging |
Note: Do all these exercises under your physiotherapist’s supervision.